Showing posts with label sewing. Show all posts

Tuesday, August 23, 2011

Chlo...livia!


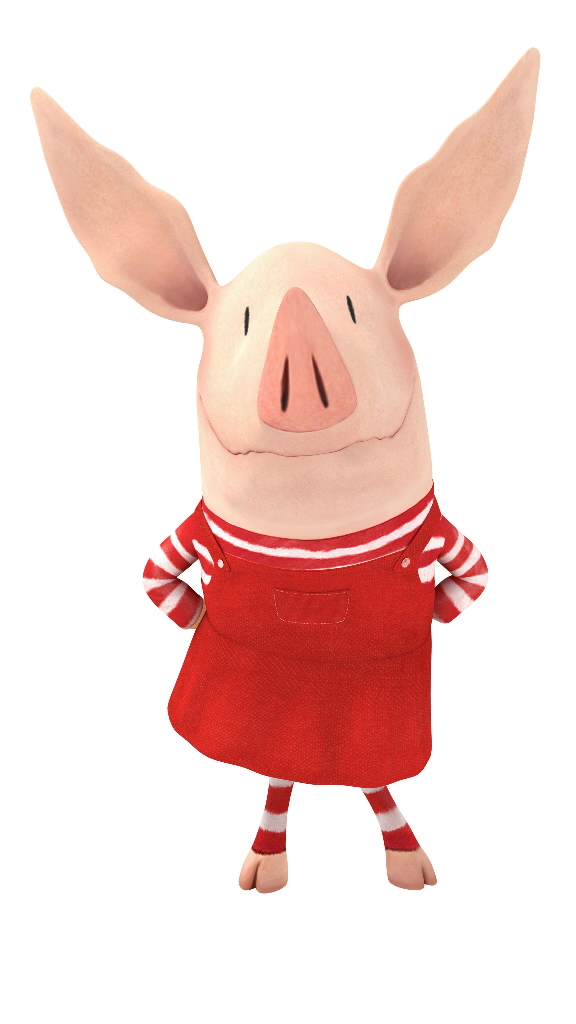
Over a year ago I posted a picture of the childrens' book character Olivia and wrote about how I finally found the fabric to sew my daughter Chloe an outfit like Olivia's. It is a red jumper with red and white striped leggings and red and white striped shirt. Well, turned out that when I took a closer look at the picture on fabric.com, it was just not going to be right (stripes too narrow) so I didn't order it and I put that little project off until I could find the perfect striped knit fabric. 

I had almost given up when surprise! I got a piece of the perfect stuff in this "bonanza box" of solid and striped knits from the fabric fairy (my kids had no idea there was such a person and were in absolute awe). And, on the same day I received an issue of Ottobre that had the perfect pieces for this outfit. Chloe wanted me to make it immediately. She's learning to imagine how fabric and patterns will turn out and I love it.


I love how it turned out. You can't see it, but there's a little pocket on the front yoke like Olivia's. I had to shorten the sleeves because the fabric was just not big enough to squeeze all the pieces on there without alteration. I'm not too disappointed about that because she can wear the shirt now without waiting for cold weather. 


I also put black trim on the shirt (another deviation from Olivia's) because I thought it would look cuter when she wore it with jeans or black pants. And isn't that pants design funny? I hated it in the magazine and only made it because I could use solid red for part of the pants and still have just enough striped fabric to 'make it work' :). Now, however, I love the pants! It kind of looks like she's wearing red shorts with leggings underneath. (sorry for the fuzzy pics. I hate using flash in the house.)

Then, right before bedtime, the fabric fairy showed up...


Yes, my daughter called herself the fabric fairy. She is going to love fabric as much as I do.

Tuesday, May 10, 2011

Easy pants.

I've been so obsessed with simplifying all my sewing down to one pattern piece projects, that I decided to change the name of this blog. I have been working on pants lately, just because it's what my kids needed. Loose fitting, casual pants and shorts need only one pattern piece. Why isn't that common knowledge? Sure, they're not tailored or fancy but we don't need that! Both of these designs use only one pattern piece and a couple extra strips cut by measurement:


p.j. pants


leggings

I think the patterns will be ready for testing soon. Question is, will school letting out give me more time or less?

Wednesday, August 4, 2010

Cadie's Dress gets a new look... (plus a giveaway)


If you haven't read it yet, Project: project is a blog where this super seamstress named Beth sews up all kinds of patterns and evaluates them (she also does some pieces about sewing machines and fabric). I love how she pays close attention to detail and puts real time into her projects. I'm so thrilled that today and tomorrow she will be featuring two of my designs: Cadie's Wrap Around Dress and  the Pretty Pinafore (which I think she paired with some adorable alligator fabric).

And, we're doing a giveaway too. Just post a comment at the end of her posts (today and tomorrow) saying which carolina fair pattern you like best, and you might win it!

Tuesday, May 25, 2010

Fabric Flower Tutorial


Okay, finally, here's the tutorial for the fabric flower that is in my Pretty Pinafore movie. I didn't take pictures while I was making it because I thought it would turn out like my Spring Flower Brooch. But it didn't so that's why this is late.


First cut a strip off of your fabric, the whole width is fine. Mine is 4" tall. Fold the fabric in half lengthwise and thread a needle with lots of thread.


Get ready to sew long stitches like this :).


So make a knot at the fold near the end.


Then sew long gatherins stitches, curving down to the long cut edge.


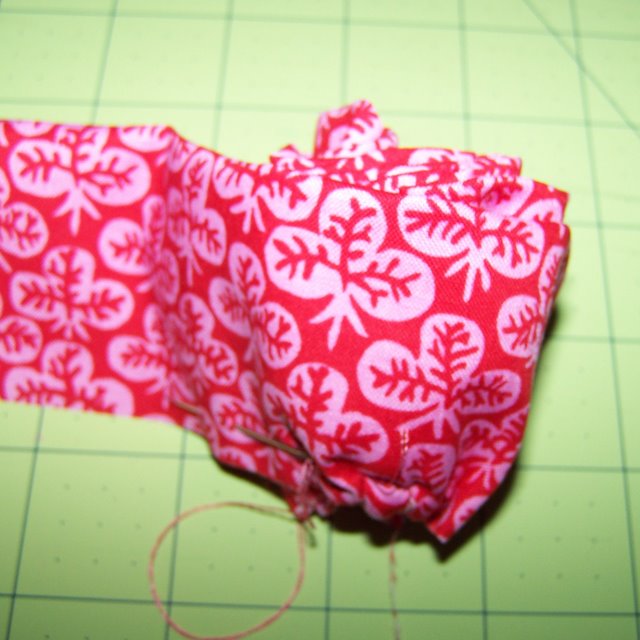
After you've sewn 4 or 5 inches, pull the thread to gather and start rolling the strip like a cinnamon roll.


Sew through the bottom to secure.


And then continue sewing more gathering stitches along the cut edge. You will be sewing a bit, pulling to gather, wrapping and securing, and then repeating. Keep in mind that the more gathered your flower is, the fuller and more "bloomed" the flower will be (see pic at end). The flower that I'm sewing here is less gathered and bloomed.


Here I am securing a bit that I just gathered and wrapped.


Near the end I wasn't gathering too much, mostly just pulling the thread a little, and then wrapping and securing.


When you get to the end, curve your line of stitching up to the fold so your cut edges will be at the bottom,


And the flower will have a nice little sloped edge on one side.


Stitch the bottom all together again to be sure it won't come apart.

At this point, you could hot glue a piece of felt on the bottom like my other flower has. I skipped it this time. And so far, I have just pinned this to things from the inside. I'm afraid to wash it. Let me know if you do and what happens...

So here is what it will look like if you have not so much gathering:


And this one has lots of gathering - it's in full bloom!


Good luck and don't forget we have a  flickr pool so you can show off what you've made.

Wednesday, May 19, 2010

My One Minute Movie

I have a new pattern for sale on my website today, and a video on youtube too! I had the idea to make this as I was rocking Cadie to sleep one night. People keep telling me I need to make a video tutorial, but I am just too video-camera shy. So this was what I came up with:


I know, it's kind of dorky. My kids love it and keep asking me how the scissors cut by themselves. I tell them I'm magic and they believe me. Then we dance.

Monday, May 10, 2010

Happy Mother's Day - something to make your life easier...Sew on a button with your sewing machine!


I know it's the day after Mother's Day, but I was busy being spoiled by my husband and kids yesterday. It was lovely.

So today, one day late, I will share with you a little secret that you will love if you hate sewing by hand. I acutally like sewing by hand, but there was a time when I didn't, and that's when I figured this out. I'm going to show you how to sew on a button (flat button - I'm not magic) with any sewing machine that can do zig-zag. I'm sure I'm not the only one who's figured this out, it is probably taught in a book somewhere, but when I googled it, the only results that I found required a special tool. My method requires some fiddling, but no special tool =).


Get together your button, fabric, matching thread, and a toothpick.


Put your fabric in place and place the toothpick right on the spot where you want to sew the button, right under the center of the presser foot. The toothpick keeps the button from being sewn on so tightly that it is hard to fit through the buttonhole later.


Balance your button on top of the toothpick, so the toothpick is between the holes on the button, and you can see the fabric underneath.


 Now comes the fiddling. Turn your stitch style to zig-zag and stitch length to zero. Then move your needle by hand (using the turning wheel on the right side of your machine) while you adjust the stitch width so that the needle goes down into one of the button holes, comes up, and goes down into the other button hole.

Move the needle up and down by hand for a few stitches until you are sure that everything is adjusted properly.

Then you can use your foot to really sew that button on!


When you have made 10-20 stitches, carefully pull the whole stack out from your sewing machine.


Use your seam ripper to help you pull the threads to the back. Tie them and cut.


Sweet!

Friday, April 16, 2010

New Flickr Brag Book


Have you created anything with one of my patterns, or using an idea from the blog?

Now you can post a picture in our new Brag Book:

http://www.flickr.com/groups/carolinafairbragbook/

Leave a comment when you do, so we will all know to check!

Tuesday, March 16, 2010

Easy fleece shrug!


So my little girl wants to wear her short sleeved tops again, but even here in Florida, I wish she wouldn't sometimes. I was thinking about making one of those cute crocheted shrugs, but something quicker came to mind - one made of fleece! I love the way that fleece is soft, stretchy, and finishing the edges is optional!

Luckily, I took pictures as I went along, so here's the tute:

Start with a piece of fleece and your cutting tools.

Measure your little girl from wrist to wrist across the back, and around her upper arm. Also measure from wrist to armpit and save that measurement for later. Chloe was 33" wrist to wrist and 8" around her arm. Then cut a rectangle of fleece using the measurements you just took, plus two extra inches each way. (mine was 35 x 10).


Now fold the short edges to the wrong side about 1/2" and stitch down for the cuff edge.


Now to make the sleeves: Remember the wrist to armpit measurement? Take that number and subtract 1. Fold your rectangle the long way (right sides together) and mark a seam from each end that is as long as you just figured. Chloe's was 11". 


Stitch the sleeves using a 1/2" seam allowance.

Try it on her and send her out!


By the way, I can't find anyone to send my little dress to (see last post). If you know anyone with a little girl who wears a size 6 months, please let me know. I really want someone to wear it!

Sunday, January 3, 2010

Cool ways to repurpose your t-shirts - read to the end for a giveaway!

This is something that has been on my mind for a while now. I have a drawer so full of t-shirts that it won't close anymore, but I can't bear to throw them away - they're still good for something! Now I know what...


1. Peasant top by Obsessively Stitching - very cute


2. Braided scarf by this old dress - I think it would make a great belt too.


3. T-shirt tote bag - fast and handy.


4. Toddler pants by rookie moms - gotta make a bunch, they look so comfy!


5. Little girl dress by Miala Projects - could be darling with the right tee

So, what have I missed? Leave a comment with a new idea, and in one week (01/10/10, 10 pm)  I'll draw a name and send someone a t-shirt. Lots of luck!

Friday, December 11, 2009

My First Giveaway - How did you learn to sew?


I think everybody I have talked to about sewing knows what a big fan I am of YouCanMakeThis.com. A couple of my friends have asked me to teach them how to sew, and I told both of them, "find a pattern you like on YouCanMakeThis.com, and then come over and we'll sew it together." The patterns all come with step-by-step photographed instructions that make it impossible to fail. And they are up-to-the-minute cute.

So anyway, for my first giveaway, I'm going to choose two lucky winners to receive the adorable pillow pattern shown above. Just leave me a comment below, answering one little question... who taught you how to sew? Or did you teach yourself using a book, the web, or something else? Next Friday on December 18th, at 10:00 pm I will draw two numbers from a hat based on how many comments there are. If one of the numbers matches your comment (1 for the first comment, 2 for the second, etc...) you'll receive an email with instructions on how to download the pattern!

If you haven't learned how to sew yet, maybe you will win and learn from this very pattern! My offer still stands, come on over and we'll sew it together!
Related Posts Plugin for WordPress, Blogger...