Friday, July 29, 2011

Cadie's Pioneer Dress


Okay, technically I didn't sew this until three days after Pioneer Day, but it just looks so pioneer-ish that that's what I'm calling it.


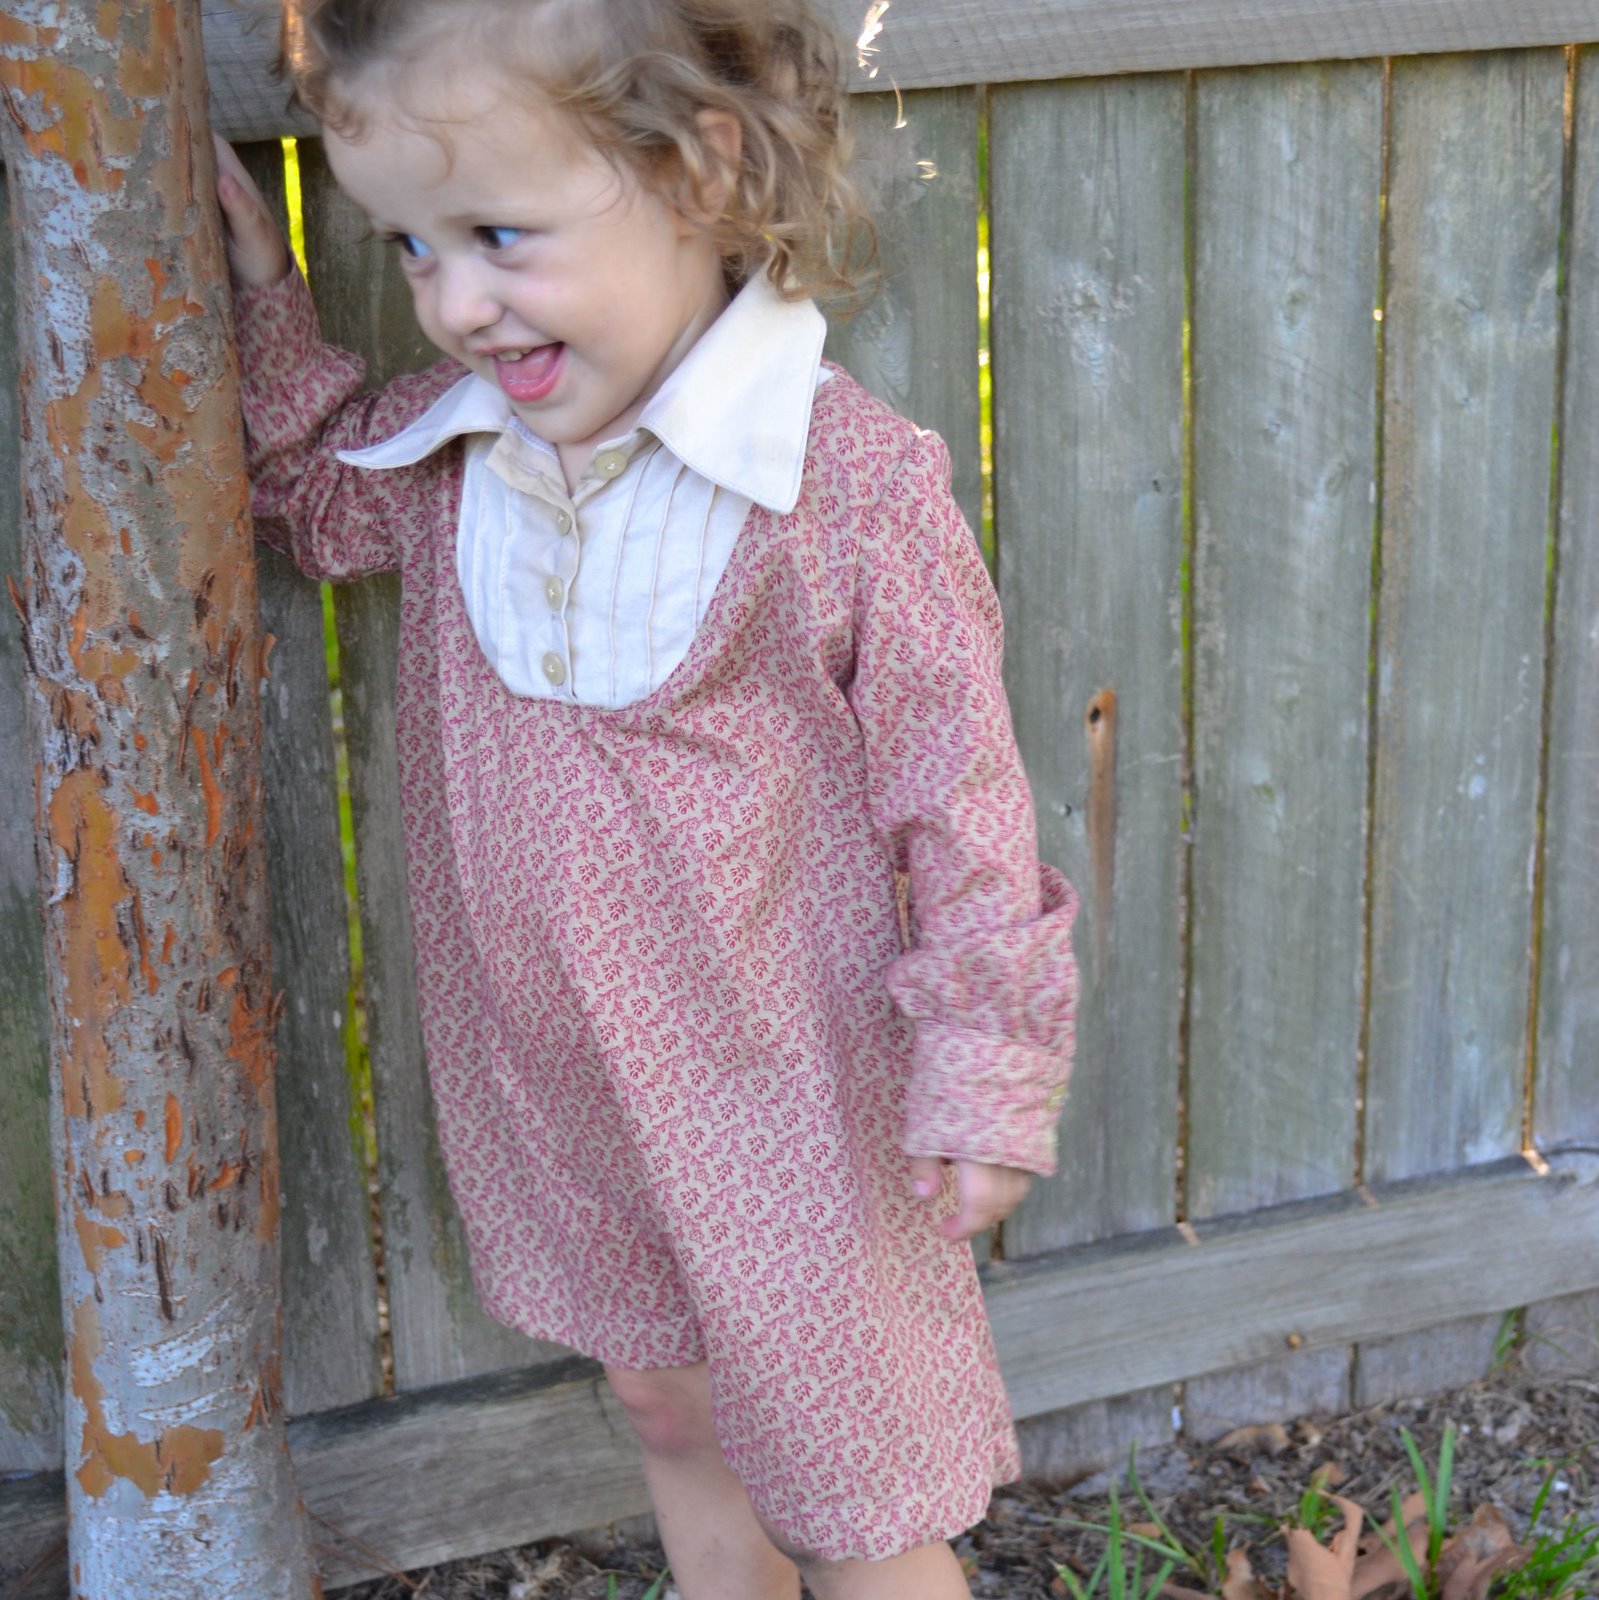
This little pattern is found in the 6/2011 Ottobre magazine and since it was my first time to try an Ottobre pattern I was hesitant to use my best fabric. So this dress is technically a 'muslin' since I just used some stuff from the bottom of the stash. But I am very happy with the way it turned out. I was leery of the whole adding-your-own-seam-allowances thing (that seems to be common in patterns outside the U.S.), but it wasn't a problem this time. Yeah, I haven't blogged about the last time I tried a pattern with no seam allowances included.  I don't know if it was the patternmaker or me, but I lost quite a few brain cells that night.


Anyway... even the little pin-tucks on the front weren't that hard. They have you sew them on squares of fabric before cutting the yoke pieces out.

When she outgrows this, I think I'll make another one using more modern fabrics. Maybe a nice bright collar with a big flowery print on bottom.

Tuesday, July 26, 2011

tiny bunting cosmetic bags


Sometimes my Pinterest boards just seem like lists of things I'll never get to make, but here's one thing that I can actually move to the 'made it!' board.


These little make-up bags are my version of this tutorial. I was thinking the leafy motif on the blue fabric would make the tiny bunting seem to be hanging from the trees all picnic-y. What do you think?

And, of course, the red ric rack just made it a party. Perfect to give away as birthday gifts. Hope you are enjoying them you-know-who-you-are!

Thursday, July 21, 2011

coming soon... the Ruffle Shrug!

UPDATE: This pattern is now finished and for sale here. Thanks for looking!


This morning the kids were with grandma so I finally found the time to stitch up one last Ruffle Shrug, taking the last of the pictures for the pattern.  Here's a peek:


Just one actual pattern piece here, then the strips cut to measurement.


Now the pattern goes off to some testers. Thanks for peeking!

(this fabric was left from making Cadie's little training underwear. Won't they look cute together??)

Monday, July 18, 2011

how to deal with the 'yucky dress' response


I found this little quote on pinterest the other day and in my mind I like to change the words 'making art' to 'sewing.' It is, after all, the way I create, escape, and run away for a few minutes. Well, it's the way I try to think about sewing because pretty often my creations get rejected. Like this little dress that I made for my 2 year old Cadie.


From the first time I showed her, she called it "yucky dress" and threw it as far from her as those chubby little arms could get it.


I thought that eventually she would change her mind, but not yet. I put it on her every once in a while (because it still looks cute and new), but it always ends up on the floor as soon as she can get it off.

That's when I take a breath and remind myself that (most of the time) the sewing and creating is for me. My family and friends getting cute things is just a happy coincidence.

Monday, July 11, 2011

selfish sewing - sewing machine covers


I finally made myself a sewing machine cover. And while I was at it I made one for the serger. Here's a picture of my semi-organized sewing space. I have taken over a corner of my kids' playroom. It is truly a playroom both day and night.


I basically followed this tutorial from Sparkle Power, but mine is even simpler. She used four different types of fabric, I think, but I didn't get that fancy. I put the owls on one side, and you can see a calming green print that I can switch to later when I'm not feeling so trendy. I do wish I had made them a bit wider, maybe a 1/2" on each side, but they're fine for what I need - something to keep the dust away on those days that I don't sew. Getting out the cases that came with these machines just seems too permanent for some reason. Like I'm not planning to sew for a few weeks or months. Heaven forbid!

Saturday, July 9, 2011

potty training can look cute (even it it's not)


So the other day I got really inspired to potty train. Well, Cadie kept taking off her diaper. And I got the itch to sew. And I found a cute pattern. And a few hours later we had these:


There is actually one more pair with turquoise blue trim, but well, it was in the washer. After searching the web for free and paid pdf patterns (instant download = yay!) I settled on this one by Ladder Hill Designs.


To be sure, I am very pleased with this pattern. Honestly, I think this version (pic from the Ladder Hill website) made with fabric waistband and legbands is cuter, but I have a huge stash of fold over elastic from an unnamed crafting bargain site I'm addicted to so I decided to use it. Plus she is pretty specific that the waistband/legband fabric must have spandex in it and since I wasn't sure about the fabric in my fabric cupboard I didn't want to risk making droopy drawers.

Funny that the pattern author and I both like Patty Young fabric. I just noticed that.

Anyway, she provides sooo many different options with this pattern that even though I dislike expensive patterns, I don't regret spending $7.95. Beside the waistband vs. elastic trim options, you can use snaps (or not for pull-ups like I made), or even make regular underwear without the soaker inside. Chloe is asking for those now.


Sooo, in conclusion, no potty training success yet except in cuteness. If only that were enough.

Tuesday, July 5, 2011

Review of the Newsboy Hat Pattern by Butterfly Tree


I've been so busy lately that I haven't been able to think about working on my own notebook full of designs, but I still crave sewing, so I've tried out a few other pdf patterns. Here's one I found in an etsy shop called Butterfly Tree. Cute name and very cute patterns. I bought this pattern with the intention of sewing one for myself, but when my Chloe saw the pictures she wanted one immediately. But I had ordered the adult size pattern, not the kids! Luckily (maybe...) when I measured her head I found that she needed the adult size medium. Yeah, it's not the pattern's fault. My kids just have large heads. I need an adult size L and my husband could fit the XL.


As you can see, it turned out soo cute. And she loves it.


Her baby sister loves it too. Here is the reverse side. Oh, did I forget to mention it's reversible?


This is one of the better-written pdf patterns I've purchased (some have been questionable, to say the least). All of the instructions are very clear -- I have just a few tips to add... 

First, cutting that 2" band on the bias is NOT optional. For some reason, I understood it to be optional and since I had just scraps of this red and pink fabric left, I didn't cut the band on the bias. It didn't go on right (to be more exact, it didn't stretch enough) and I almost despaired because it was too short. But then I realized that a piece of bias trim might substitute nicely. I went through my stash of bias trim and found this red stuff that just needed to be re-ironed to work. Not bad, huh?

Second, every time I stitched the hat lining to the brim my stitches showed up on the outside. You'll come to this near the end of the pattern. I'm not sure if that's intentional (to look something like topstitching) or if that's my fault, but it happened on both hats I made and it's not exactly neat looking. If I make it again I will definately just hand-stitch the lining to the brim. I don't mind handstitching in small instances like this.

I made a hat for myself too (and I love it) but since I was the lone photographer that day, no pictures of it yet. Maybe soon :)
Related Posts Plugin for WordPress, Blogger...