Tuesday, December 27, 2011

Q&A with the Authors of One Yard Wonders, and announcing the winner...

Continuing my love of the fantastic new book One Yard Wonders (Fabric By Fabric), I get to share with you a little email Q&A that I got to do with the authors, Rebecca and Trish. When I found out that I got to do this, I thought a lot about what I would ask them. I mean, if you got to ask two super crafty and super successful people that you really admired anything at all, what would you say?
So this is what I asked, and what they answered. I love their answers...

How have your lives changed since hitting it big with a bestselling sewing book plus a sequel?

Thursday, December 22, 2011

Christmas love + giveaway reminders

Hey there, hope you're getting things done and wrapped up. I think we could be onto the hourly countdown by now, if someone cared to check how many hours are left until Christmas. I love the feeling of getting something finished. The satisfaction is too sweet, and the anticipation of starting a new project might be even sweeter! That's why I'm posting pictures of my Cadie's little quilt which I just finished not 10 minutes ago.


I think this is my favorite quilt that I've made so far. The color combination came out just to my liking. And that binding - well let me tell you that the quilt sandwich sat on my table for about a month with me having no inspiration to finish it. Then I saw this brown gingham in my stash and I was all excited to work on it again.

Monday, December 19, 2011

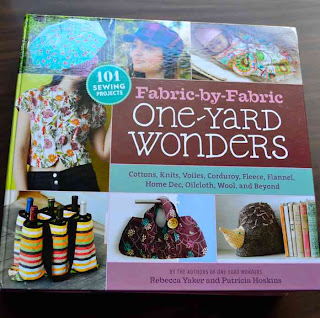
One Yard Wonders (Fabric By Fabric) book giveaway!

Sooo... look which book recently came out, and just in time for Christmas:


And do you recognize this???


The Button Up Bolero

And this???

The Pretty Pinafore

Yes, I was lucky enough to have two of my patterns selected for the new One Yard Wonders sequel. It's called Fabric By Fabric, and its STUFFED with projects using all kinds of fabric. I have been waiting so long for my copy to arrive so now I can finally try out some of those projects. I actually got one almost done on Saturday, so expect a post about that soon.

Meanwhile, the publisher (Storey Publishing) is letting me give a copy of the book away to one lucky reader.  All you have to do is leave a comment below and you'll be entered.

One bonus entry is available too: just go to our sister site SewCanShe.com and sign up for the awesome newsletter so you can get a free sewing tutorial delivered to your inbox every day. (Oh, and while you do that, you'll be entering to win 2 lucious yards of  Amy Butler Fabric - talk about bonus entry!) Be sure to come back to leave another comment telling me that you did.

Comments will be closed at midnight (Eastern Time) on December 25th, 2011. You must have a US Delivery address to be eligible for this giveaway. I'll choose a winner using random.org on December 26th. Who says all presents have to be given on Christmas day???


P.S. A bunch of the blog contibutors are doing a blog tour so if you want to check it out, here are the dates and links:

12/13/2011 Craft Buds
12/15/2011 Nifty Kidstuff
12/16/2011 Nom Nom Nom Nom
12/16/2011 Quaint and Quirky
12/17/2011 ikatbag
12/17/2011 Two Brown Birds
12/18/2011 Sharon Sews
12/19/2011 carolina fair designs (that's me!)
12/19/2011 Under Construction
12/21/2011 Craftzine
12/21/2011 Neuroses Galore
12/21/2011 Emily Steffen
12/23/2011 Spincushion
12/27/2011 One Inch World
12/28/2011 Sew Sew Etc.
January ‘12 Lu Lu Carter
January ’12 Fiberosity
January ’12 Zuhause
January ’12 Obsessively Stiching
January ’12 No Bad Days
January ’12 Craft & Cackle
January ’12 AfricanKelli

(You can still visit and read the old ones too!)

Comments are now closed. The winner will be announced soon!

Thursday, December 15, 2011

Introducing SewCanShe.com plus an Amy Butler Fabric giveaway!


I'm so excited to share my new site because who doesn't love something free??? For years now my browser's bookmark files have been filling up with project ideas that I need to try. It's helpful because people often ask me if I know how they can make such-and-such, and I tell them I'll just go home and email them the link to a tutorial. Well, now I get to share those tutorials with anyone who will look (or sign up for the newsletter). I'm going to update the page with a new tutorial every day, so you may want to subscribe to the newsletter so you won't miss anything. I've already contacted a bunch of my favorite tutorial writers so they know what's up, and if you have a tutorial you want to submit, there's a place for that too!

And, here's the best part... I'm giving away two yards of this most beautiful fabric from Amy Butler's new Lark collection:


All you have to do is sign up for the newsletter, which I'm sure you'll want to do anyway. I mean, you'll get a new sewing tutorial delivered to your inbox every day. I'm going to rotate through the categories holiday love (for the next 10 days), home love, kid love, crafty love, and self love. Who just freaked out when I hinted that Christmas is only 10 days away? Okay, I am freaking out so I need to get back to my sewing now. Bye!


Tuesday, November 29, 2011

Pretty, Easy, Pillowcase (with a tutorial)

When I was putting away my Amy Butler Lark fabric after making this tablet cover, I decided it was just too beautiful to stop looking at yet, so I had to make something else with it.

After rifling through my stash I found some vintage crocheted lace that I picked up a yard sale last year. Suddenly I was inspired to make a pillowcase. Not just any pillowcase, but one fit to be made into a pillowcase dress someday. Because who is making the pillowcases that will be turned into dresses 50 years from now? We are, of course.

I took pictures along the way so you could see what I did...

Tablet cover for me!


Thanks to black-friday specials and a very generous dad (thank you!!!!!) I desperately needed to sew a case for this cute little tablet computer. If you google kindle cover or ipad cover there are tons of tutorials and I picked this one because I wanted something I could leave on the tablet while I used it (opposed to the little pouch type which is also nice), plus I loved the way you could stand it up.

The tutorial is found here at chicaandjo.com. Instructions are included for customizing the pattern to any size device, which is just what I needed.

Thursday, November 24, 2011

Happy Thanksgiving!

Three days of cooking and baking have culminated in a feast of turkey, ham, sweet potato casserole, green bean casserole, three kinds of cranberries, relishes, potatoes, and then the dessert...

Family has come from near and far to gather and visit and soon the shopping will begin! I love getting out there in the middle of the night to get those good deals. 

My etsy shop is now running it's annual black friday sale with any two patterns for $10.

I hope that somehow the frenzy to get more stuff won't make us less thankful for what we have already been blessed with!

Sunday, November 20, 2011

Chloe's secrets to perfect sugar cookies.

Tonight I had to make sugar cookie stars for my second grader's school class to decorate tomorrow. I made the dough early and let it sit in the fridge for 3 hours to get firm. But then when I tried to roll it out and cut out some cookies the dough was sticking everywhere, I was ruining every star trying to get it off the table, and my two year old was sticking her little chubby hands in everything.

I was getting ready to scream when I heard a calm little voice beside me say "just sit down mom and let me help you. I'm really good at making cookies."

I thought about it for a second and then backed away because she was right, she is good at making cookies, better than me, and she is only 6 1/2.


Friday, November 18, 2011

Another cute version of Cadie's top, plus some naked babies...


Okay, good morning all of you who are just getting up from a twilight induced hangover. If you don't know what I'm talking about then I think I'm happy for you. I'm not sure how I feel about this installment. It was... too graphic and... too graphic. Honestly I had to put my head down between my knees at one point because I thought I might pass out and that has never happened to me in a movie before. But I'm not usually sitting in a movie theatre at 2 in the morning either so maybe that has something to do with it.

Anywho... I am so happy that another one of my patterns just got reviewed. Kristen over at Three In The Nest has made her own "top" version of my pattern Cadie's Wrap Around Dress and Top. It's so darling with a little bunny applique on it and you get to see her own little Caroline modelling it. (pssst... love the name ;) ). And, she's hosting a giveaway, so head on over for your chance to get the pattern for free.

And here's a hint of what I've been working on lately...

Monday, October 31, 2011

Making your own rib-knit waistband.


I know it's technically Halloween today, but all our costumes are done, so I got started on my Christmas sewing (yay!) by making these soft and comfy pj pants. I've made a bunch of things lately with rib knit waistbands (underwear, a skirt, shorts) so I thought this pattern might be cute with one too.

This is a waistband that I really like because it's cute and comfortable and easy to adapt to almost any skirt or pants pattern that would normally have an elastic casing. If you are worried about it holding the pants or skirt up,
you can still put elastic inside.


Monday, October 10, 2011

Abby in her Tropical Fish Mittens (free pattern)

My sister just texted me a picture of her Abby wearing the tropical fish mittens I made for her two years ago!

I'm so tickled that she's still wearing them, and amazed it's already that cold where they live. I guess I shouldn't be though, it's Idaho ;). I love the way that we keep handmade gifts longer than others. It's just so difficult to get rid of something knowing the person who worked hard making it.

In case you haven't seen it, the Tropical Fish Mitten Pattern is a free download on my website! Check it out!

Saturday, September 17, 2011

Napping?

The other day I decided to take pictures of my two littlest ones taking their naps. But then I found that they weren't sleeping, so I told them to pretend. Here's what I got:


Then I went in again when they really were sleeping, and it was just as sweet.


That little dress I made using New Look 6195 (got it at goodwill for 59 cents so I don't even know if it's in print anymore). But I modified it so much, that it's probably not even worth mentioning the name of the pattern. Forget I said anything. It is also the "yucky dress" that I blogged about a few months ago, but for some strange reason Cadie picked it out of her dresser and wanted to wear it.

Connor's wearing the Fishsticks curved raglan pattern that I love. It's like a basic tee but cuter and easier. I keep making them because my kids keep choosing them as their favorites.

Do you like the peanut butter all over both of them? I really should wash them up better before naps.

___________

And I just used random.org to pick the winner of the My Memories Digital Software Suite. It's Angie from Mama Lusco Handmade. You should be getting an email about it soon, Angie!

Carl's scrapbook

Today is the last day to enter to win a copy of the MyMemories Digital Scrapbooking Suite. I thought I'd show you some of the pages my 7 year old son made.


After I showed him how to use the basic templates, embellishments, and word art feature, he just wanted to be left alone.


He scavenged his favorite pictures from our computer and iphones, and then figured out how to put in some pictures he's been drawing in paint.

I told him when he had about 39 pages, I'd order him a book.

[I'm on the email list at artscow.com. Their stuff is dirt cheap. His 39 page book will only cost me $12.99 including shipping. But you have to get on the email list for those codes. And the products come from Hong Kong so don't expect anything too quickly. I waited 2 months once!]

So click here to enter to win this cool software. I'm picking the winner around 10 tonight.


Thursday, September 15, 2011

First dance class

Don't forget to enter to win a copy of My Memories Digital Scrapbooking Suite (previous post)! There's only two days left to enter. All week long my 7-year old has been working on his own scrapbook that I'll have to order soon. It's that easy.

_____________________

The unfortunate little sister.

Cadie has been watching her older sister take dance class for her whole 2-year life. But today was her day to finally be on the other side of the glass. Really. I had to take pictures through smudgy, finger-printy glass. But it was worth it.

Today, Cadie was the princess fairy...

 invited to the tea party...

the one who got to try new things...

see how pretty she is...

and look at all the people from that side of the glass...

Cadie's little petal filled tutu is one that my sister and I made together and it's blogged about here. Tutu cute.

Friday, September 9, 2011

MyMemories Software Review and Giveaway


As all of you know, I love to sew. Sewing is what relaxes me, inspires me, and keeps me sane. I admire scrapbookers and the lovely way they preserve family memories, but I just can't get into it because I'd rather be sewing. About once or twice a year, however, I go to one of those online photo book sites and throw a bunch of pictures together in a book (I always have tons of pictures) so I can feel like I am preserving our family's memories too. This is technically called digital scrapbooking and there are just as many (if not more) digital papers, doo-dads, and sparkly things to make your pages special. But, sad to say, making beautiful pages is not a talent I have developed much because, well, I'd rather be sewing.

So I was a pretty surprised when Liz from MyMemories.com emailed me and asked if I wanted to test their digital scrapbooking software. I mean, of course I would love to (it's past time that I made another family picture book), but could I make anything cute enough? Would I really want to stop sewing to do it?

But I answered yes because she also offered a free software package for one of my readers too. Plus a coupon code for $10 off! I downloaded the software and then quickly added to my starter set of "scrapbooking stuff" a bunch of free downloads that they also offer.

After I got started, I was continually amazed at how easily I could put together cute pages. I guess I'm used to how s l o w the online photo book programs work, and having it installed on my computer made things so much easier.

Long story short, I haven't been able to sew for 2 days and nights now because I have been glued to the computer making digital scrapbook pages. And more. First I made a 45 page book. Then I saw that I could make it iPod (and iPhone) ready so I added music and exported it that way. Then I started making jpegs. I mean, really the possibilities are endless. You can even print the pages yourself.

Then I discovered that I could also open up the other digital papers and doo-dads that I already have and use them too.

So... for this to be a fair review of the software, here's my list of pro's and cons:

Pros:
It is easy to use and very intuitive - like it knows what you want before you do.
It's specialized just for scrapbooking - LOTS of options for making unique pages.
It organizes all of the doo-dads and sparkly things (as well as word art) so you can pile them on almost effortlessly.
You can export right to their site to order books and calendars, or export in other formats (.jpg, .mov, etc.)
When you download extras from MyMemories.com, it installs them automatically into the program.

Cons:
It is way faster than online digital scrapbooking, but I would still love it to be faster.
I did have it crash once, but to be fair, I was trying to do about 5 things at once (and it had backed up my album so I didn't lose anything when I restarted - very nice)
You can edit pictures some, but not in great detail like Photoshop (but my photos were already edited so this didn't bother me).

Here are some of my pages (don't be too critical, remember, I'm a sewer not a scrapbooker!):


Now I can't wait to give a copy of this software away to one of you! Here are all the ways you can enter:

First entry: visit www.MyMemories.com and choose a favorite scrapbooking kit. Tell me what it is in the comments. (Mine is A to Zoo, I'm gonna have to get it!)

Bonus entries {for each one, make a new comment telling me what you did}:

Like MyMemories.com on Facebook- http://www.facebook.com/mymemoriessuite

Follow the MyMemories blog- http://blog.mymemories.com/


Follow this blog.

This giveaway will run until next Saturday September 17th. Around 10:00 pm I'll use a random number generator to pick the winner from all the comments (only one entry per comment, so make multiple comments for your bonus entries!). If I don't already have your email address, please leave it.

Hope you win! But if you don't, use coupon code STMMMS67750 to get $10 off the MyMemories Software Suite. That's over 25% off. Good luck!


Comments are closed on this giveaway, but the coupon code is still valid.
Sunday, September 4, 2011

Tutorial for a Cute Ruffle-back Sundress (plus a coupon code for 83% off the pattern!)

Happy Labor Day!!! To make this a day of sewing for all of us, my friend April wrote this darling tutorial for tweaking Cadie's Wrap Around Dress to add a back full of ruffles. And I'm offering this pattern for only $1 this week only. Scroll to the bottom to get the coupon code. :)


Hi!  I'm April and I blog over at Wildflowers & Whimsy!  I absolutely love Caroline's Cadie Wrap Around Dress!  I just think it it sooo adorable, but if you have ever visited my blog, you know I also LOVE ruffles!!!  And if you haven't been to my blog, just let me tell you, I LOVE RUFFLES!!!!  So, I decided to add ruffles to the back of the dress.  I think it's a really simple and fun addition!

Here's what I did:

**Note:  Please know that some of my pics don't match up exactly to what I am telling you to do.  I had a lot of trial and a lot of error, so this is more of a "do as I say, not as I do" tutorial!  lol**


Cut out the dress according to the pattern.  Then, cut out the center right at the front and back neckline, so that you now a front and back instead of one piece.


Since we changed the style to a sundress, the front and back neckline will be too wide now so you will need to gather them...I just sort "eyeballed" it, as they say...  ; )


Next, I cut out two straps.  

9m-18m ~ 4" x 7"
2 - 4  ~  4" x 8"
5 - 8  ~  4" x 9"

Fold them in half long ways and press.  


Open it back up and fold the raw edges to the center crease and press.


Now, fold it back closed, press and edge stitch down each side.


Now attach them to each side of the front of the dress like this, but the part that will attach to the back should be pointing to the bottom of the dress...not up like in this pic.  In other words the raw edges should be touching.

Now finish the edges of the FRONT of the dress with bias tape according to the instructions.  Then, press the straps up like they are in this pic and top stitch across the top edge to tack them up and in place. 
  

Fold the back piece like this and press the sides to make creases...you will only add ruffles in between the creases.  Measure between the creases and multiply that number by 2, so if it's 8 inches btwn the creases, you will cut your ruffles 16" long.

Now decide how long you want your ruffles to be, and divide the height of your back piece by that number.  

EX:  you want your ruffles 3" and your pattern piece is 21" from top to bottom.  21 / 3 =7

So you would cut 7 - 3.5" x 16" rectangles for your ruffles  (the extra half inch in the height is for seam allowance to attach the ruffles.)  I recommend either cutting your ruffles on the bias or using pinking shears so you don't have to worry about finishing all those egdes.  You can see below I used pinking shears...I think it added a cute detail...


Gather your ruffles along the top edge, and attach them to the back of the dress between the creases.  Now, I have a confession.  I can NEVER figure out how to properly space ruffles!  So, I just lay them out from bottom to top pinning as I go and just sort of "eyeballing" like I said before.  Then, once I have them all placed how I like, I stitch them down.

Once, you have all your ruffles stitched in place, attach the straps and finish the edges with bias tape just as you did for the front of the dress.  Make sure at the top where the ruffles go all the way to the edge of the pattern piece you put the edges of the ruffles under the bias tape so that they don't stick out...trust me it looks weird...

Last add the closures according to the directions and you are done! 


**Note:  If you want to use ricrac like I did on the edges, apply it on top of the bias tape...not instead of like I did!...seriously made myself a headache when I did that!**


Thanks for having me Caroline!  Hope y'all enjoy!
April

wildflowersandwhimsy.com
wildflowersandwhimsy.etsy.com


...and here's the coupon code so you can get the pdf pattern for Cadie's Wrap Around Dress for just $1 and make a little ruffle-back sundress for your own little girlie girl.  Just visit my website www.carolinafairdesigns.com and after you put Cadie's Wrap Around Dress & Top in your cart you can use coupon code 'cadieforadollar' to get the price reduced to $1. This coupon code will only work until Saturday, September 10, 2011, so don't wait! If you want to buy it in my etsy shop instead, put the coupon code in the notes to seller section so I can refund you $4.95 (etsy won't let me make the right kind of coupon code for this). Happy Labor Day everyone!

Friday, September 2, 2011

Keeping up

I have decided to sew all of my kids clothes. At least for a while. Until I can't keep up with what they need or until they grow too old to wear clothes that "mom made". I'm hoping that last part doesn't happen for a long time.

This evening in the backyard I got pictures of some things I have made lately. I have gotten into a comfortable routine of tracing or printing up patterns and cutting fabric a few nights a week and then during the day when I get time I can sit down at the sewing machine and serger for a bit.

This one I actually cut out last night and stitched up before preschool this morning:


I love this pattern for my boys. It is one of Bonnie's from Fishstick's Designs. It is easy to cut, easy to sew, and always looks nice. And, if you make it from other shirts (like his from a new unwanted white tee and a blue golf shirt that didn't fit Dad) you can make good use of pre-hemmed edges. That's how I could put it together so fast.


Here's a little skirt I made so many mistakes on that I can't believe it still looks so cute. I mean, there's 4 rows of ruffles on the front,


only 3 rows of ruffles on the back (I ran out too soon), and they go around and around in a crooked, wobbily way. I really wasn't trying that hard because I hated the fabric to begin with (Chloe found it in the bargain section at JoAnns and I gave in because it was only $2/yd). It's like gold lame with snowflakes. And she looks like a rockstar wearing it. Go figure.


And here's Cadie. This is a little tee from another Ottobre back issue (3/2009, I think). I can't have enough white shirts for my girls. They just go with everything and under everything when it's cold.


My favorite part of this shirt is the little puffy sleeves. I think I'll be making it again soon.

That's it for now. Happy back-to-school, everyone!


Related Posts Plugin for WordPress, Blogger...